
hello.markdown 2.1 KB
OpenCV iOS Hello {#tutorial_hello}
@prev_tutorial{tutorial_ios_install} @next_tutorial{tutorial_image_manipulation}
| | | | -: | :- | | Original author | Charu Hans | | Compatibility | OpenCV >= 3.0 |
Goal
In this tutorial we will learn how to:
- Link OpenCV framework with Xcode
- How to write simple Hello World application using OpenCV and Xcode.
Linking OpenCV iOS
Follow this step by step guide to link OpenCV to iOS.
-# Create a new XCode project. -# Now we need to link opencv2.framework with Xcode. Select the project Navigator in the left
hand panel and click on project name.
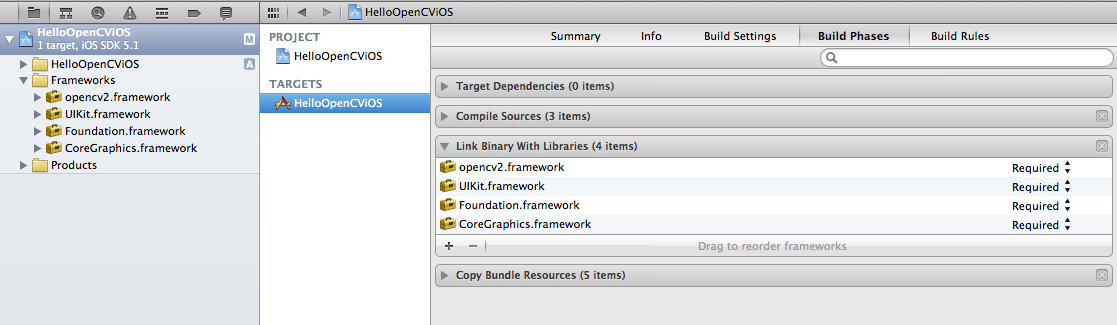
-# Under the TARGETS click on Build Phases. Expand Link Binary With Libraries option. -# Click on Add others and go to directory where opencv2.framework is located and click open -# Now you can start writing your application.
Hello OpenCV iOS Application
Now we will learn how to write a simple Hello World Application in Xcode using OpenCV.
- Link your project with OpenCV as shown in previous section.
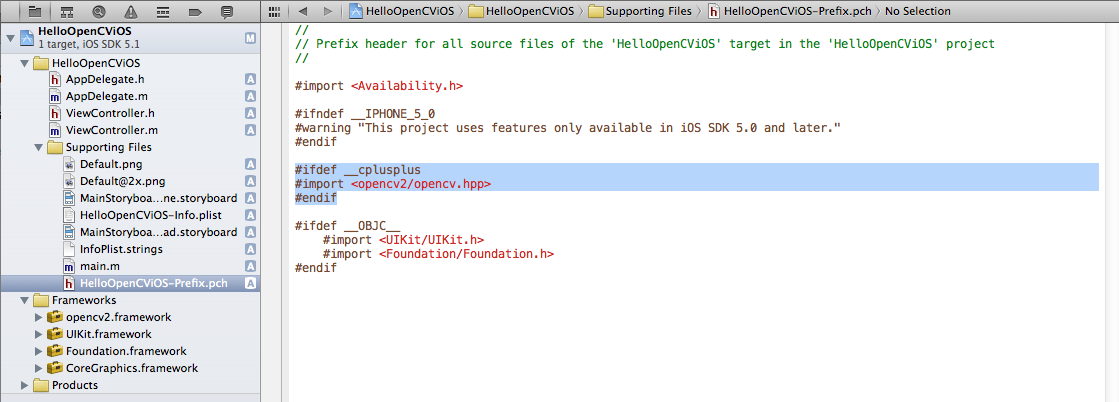
Open the file named NameOfProject-Prefix.pch ( replace NameOfProject with name of your project) and add the following lines of code. @code{.m} #ifdef __cplusplus #import #endif @endcode
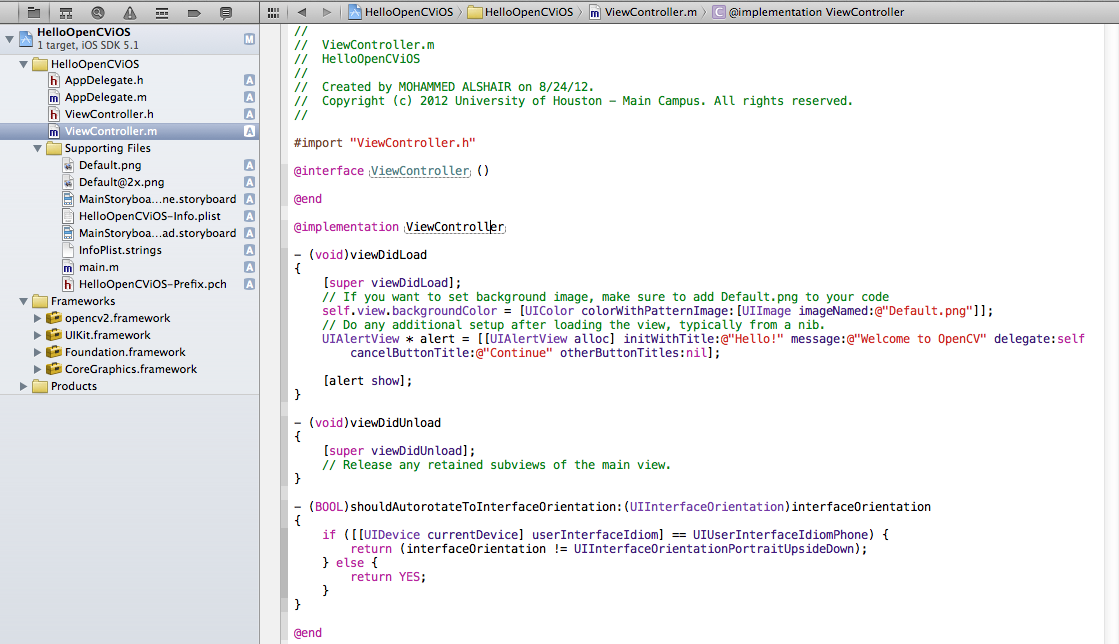
Add the following lines of code to viewDidLoad method in ViewController.m. @code{.m} UIAlertView * alert = [[UIAlertView alloc] initWithTitle:@"Hello!" message:@"Welcome to OpenCV" delegate:self cancelButtonTitle:@"Continue" otherButtonTitles:nil]; [alert show]; @endcode
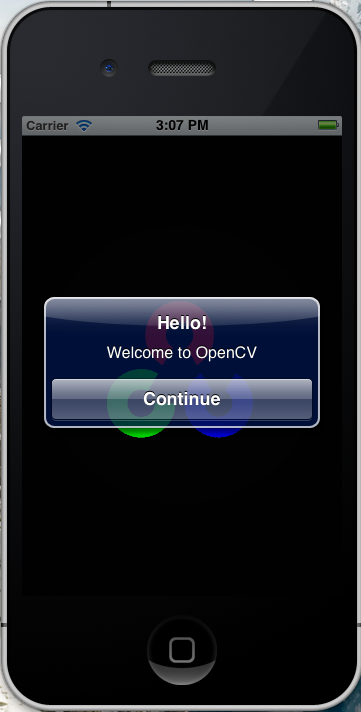
You are good to run the project.
- The *.m file in your project should be renamed to *.mm.
- You have to manually include AssetsLibrary.framework into your project, which is not done anymore by default.
Output
Changes for XCode5+ and iOS8+
With the newer XCode and iOS versions you need to watch out for some specific details